在 DataGridView 中完整实现增、删、改、查(CRUD) 核心操作,这是 WinForm 开发中处理结构化数据的常用需求。下面将基于「实体类集合 + 数据绑定」(项目开发首选,可维护性强),分步讲解完整实现方案,包含代码示例和关键注意事项。
一、前置准备 1. 定义核心实体类(以 Student 为例,与上一篇讲解保持一致,方便衔接):
// 学生实体类(业务数据模型) public class Student { public int Id { get ; set ; } // 唯一标识(用于删、改、查的精准匹配) public string Name { get ; set ; } // 姓名 public int Age { get ; set ; } // 年龄 public string ClassName { get ; set ; } // 班级 }
2. 窗体布局准备(核心控件)
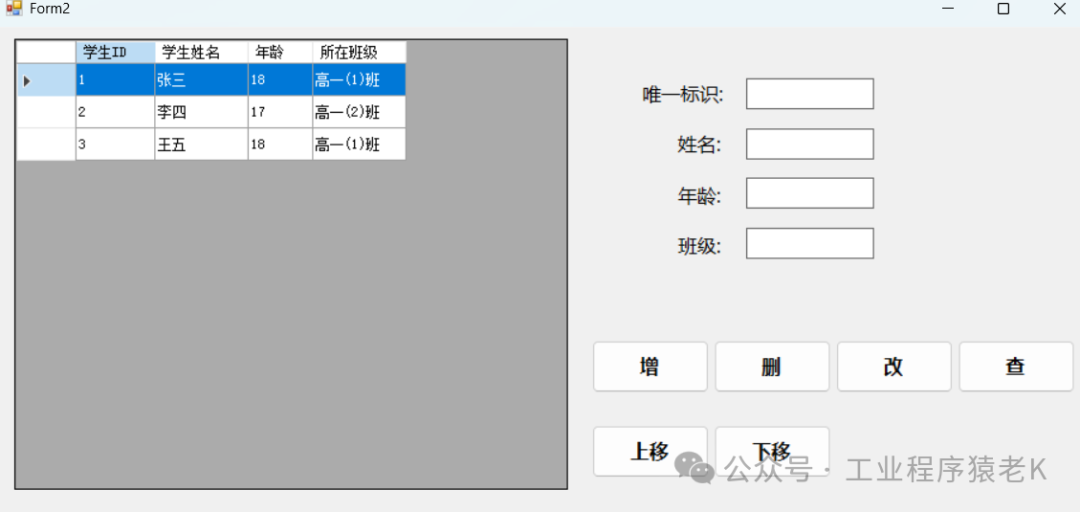
• DataGridView 控件(命名 dgvStudent):展示数据 • 4 个 TextBox 控件(分别命名 txtId、txtName、txtAge、txtClassName):输入增 / 改数据 • 4 个 Button 控件(分别命名 btnAdd、btnDelete、btnUpdate、btnQuery):触发增、删、改、查操作 • 全局数据源(保留原始数据,避免筛选 / 操作后数据丢失): // 全局学生集合(作为DataGridView的底层数据源,所有CRUD操作均基于此集合) private List<Student> _studentGlobalList = new List<Student>() { // 初始化测试数据 new Student(){ Id= 1 , Name= "张三" , Age= 18 , ClassName= "高一(1)班" }, new Student(){ Id= 2 , Name= "李四" , Age= 17 , ClassName= "高一(2)班" }, new Student(){ Id= 3 , Name= "王五" , Age= 18 , ClassName= "高一(1)班" } };
3. 初始化方法(窗体加载时绑定数据,配置 DataGridView 基础属性)
private void Form1_Load ( object sender, EventArgs e ) { // 配置DataGridView基础属性(优化交互) dgvStudent.ReadOnly = false ; // 允许编辑(支持直接单元格修改,辅助"改"操作) dgvStudent.AllowUserToAddRows = false ; // 禁止末尾空行(避免与手动"增"冲突) dgvStudent.AllowUserToDeleteRows = false ; // 禁止直接删除行(统一通过按钮触发,更安全) dgvStudent.SelectionMode = DataGridViewSelectionMode.FullRowSelect; // 整行选择(方便获取选中数据) dgvStudent.AutoSizeColumnsMode = DataGridViewAutoSizeColumnsMode.AllCells; // 列自动适应内容 // 初始化绑定数据到DataGridView BindDataToDgv(_studentGlobalList); } // 通用数据绑定方法(封装,方便重复调用刷新表格) private void BindDataToDgv ( List<Student> dataList ) { // 先清空原有绑定(避免数据残留、列重复问题) dgvStudent.DataSource = null ; // 重新绑定新数据源(List<T> 直接绑定) dgvStudent.DataSource = dataList; // 可选:修改列头文本(让表头更友好,默认是实体属性名) dgvStudent.Columns[ "Id" ].HeaderText = "学生ID" ; dgvStudent.Columns[ "Name" ].HeaderText = "学生姓名" ; dgvStudent.Columns[ "Age" ].HeaderText = "年龄" ; dgvStudent.Columns[ "ClassName" ].HeaderText = "所在班级" ; }
二、查(Query):数据查询 / 筛选 核心逻辑:基于全局数据源,通过条件筛选(LINQ)获取匹配数据,再重新绑定到 DataGridView,支持精准查询(如按 ID)和模糊查询(如按姓名 / 班级)。 实现代码(按 ID 精准查询 + 按姓名模糊查询)
private void btnQuery_Click ( object sender, EventArgs e ) { // 1. 构建查询条件(兼容空输入,空输入时返回全部数据) int queryId = 0 ; int .TryParse(txtId.Text.Trim(), out queryId); // 尝试转换ID(避免格式错误) string queryName = txtName.Text.Trim().ToLower(); // 姓名模糊查询(忽略大小写) // 2. LINQ筛选数据(基于全局数据源_studentGlobalList) var queryResult = _studentGlobalList .Where(s => // ID匹配(输入非0时生效,输入0时忽略ID条件) (queryId == 0 || s.Id == queryId) && // 姓名模糊匹配(输入非空时生效,空时忽略姓名条件) ( string .IsNullOrEmpty(queryName) || s.Name.ToLower().Contains(queryName)) ) .ToList(); // 3. 重新绑定数据,刷新DataGridView展示查询结果 BindDataToDgv(queryResult); // 4. 提示无匹配数据 if (queryResult.Count == 0 ) { MessageBox.Show( "未查询到符合条件的数据!" , "提示" , MessageBoxButtons.OK, MessageBoxIcon.Information); } }
关键说明
• 保留全局数据源 _studentGlobalList,查询仅筛选副本,不修改原始数据,避免后续操作数据丢失。 • 兼容空输入,提升用户体验(输入 ID 则精准查询,输入姓名则模糊查询,都为空则返回全部数据)。 三、增(Add):新增数据 核心逻辑:验证输入数据的合法性 → 构建新实体对象 → 添加到全局数据源 → 重新绑定数据刷新表格 → 清空输入框。 实现代码
private void btnAdd_Click ( object sender, EventArgs e ) { // 1. 输入数据验证(避免无效数据) if (! int .TryParse(txtId.Text.Trim(), out int newId)) { MessageBox.Show( "学生ID必须是有效数字!" , "错误提示" , MessageBoxButtons.OK, MessageBoxIcon.Error); txtId.Focus(); return ; } if ( string .IsNullOrEmpty(txtName.Text.Trim())) { MessageBox.Show( "学生姓名不能为空!" , "错误提示" , MessageBoxButtons.OK, MessageBoxIcon.Error); txtName.Focus(); return ; } if (! int .TryParse(txtAge.Text.Trim(), out int newAge) || newAge <= 0 ) { MessageBox.Show( "年龄必须是大于0的有效数字!" , "错误提示" , MessageBoxButtons.OK, MessageBoxIcon.Error); txtAge.Focus(); return ; } string newClassName = txtClassName.Text.Trim(); if ( string .IsNullOrEmpty(newClassName)) { MessageBox.Show( "班级不能为空!" , "错误提示" , MessageBoxButtons.OK, MessageBoxIcon.Error); txtClassName.Focus(); return ; } // 2. 验证ID唯一性(避免重复添加) if (_studentGlobalList.Exists(s => s.Id == newId)) { MessageBox.Show( "该学生ID已存在,无法重复添加!" , "错误提示" , MessageBoxButtons.OK, MessageBoxIcon.Error); txtId.Focus(); return ; } // 3. 构建新实体,添加到全局数据源 _studentGlobalList.Add( new Student() { Id = newId, Name = txtName.Text.Trim(), Age = newAge, ClassName = newClassName }); // 4. 重新绑定数据,刷新DataGridView BindDataToDgv(_studentGlobalList); // 5. 清空输入框,方便下次添加 ClearTextBoxes(); MessageBox.Show( "数据新增成功!" , "提示" , MessageBoxButtons.OK, MessageBoxIcon.Information); } // 封装:清空所有输入框 private void ClearTextBoxes () { txtId.Clear(); txtName.Clear(); txtAge.Clear(); txtClassName.Clear(); }
四、改(Update):修改数据 核心逻辑:获取 DataGridView 选中行 → 验证选中有效性 + 输入合法性 → 从全局数据源找到对应实体(按 ID 匹配) → 更新实体属性 → 重新绑定数据刷新表格。 实现代码
private void btnUpdate_Click ( object sender, EventArgs e ) { // 1. 验证是否选中了要修改的行 if (dgvStudent.SelectedRows.Count == 0 ) { MessageBox.Show( "请先在表格中选中要修改的数据行!" , "提示" , MessageBoxButtons.OK, MessageBoxIcon.Warning); return ; } // 2. 输入数据验证(与新增一致,省略重复注释) if (! int .TryParse(txtId.Text.Trim(), out int updateId)) { MessageBox.Show( "学生ID必须是有效数字!" , "错误提示" , MessageBoxButtons.OK, MessageBoxIcon.Error); txtId.Focus(); return ; } if ( string .IsNullOrEmpty(txtName.Text.Trim())) { MessageBox.Show( "学生姓名不能为空!" , "错误提示" , MessageBoxButtons.OK, MessageBoxIcon.Error); txtName.Focus(); return ; } if (! int .TryParse(txtAge.Text.Trim(), out int updateAge) || updateAge <= 0 ) { MessageBox.Show( "年龄必须是大于0的有效数字!" , "错误提示" , MessageBoxButtons.OK, MessageBoxIcon.Error); txtAge.Focus(); return ; } string updateClassName = txtClassName.Text.Trim(); if ( string .IsNullOrEmpty(updateClassName)) { MessageBox.Show( "班级不能为空!" , "错误提示" , MessageBoxButtons.OK, MessageBoxIcon.Error); txtClassName.Focus(); return ; } // 3. 从全局数据源中找到要修改的实体(按ID精准匹配) Student targetStudent = _studentGlobalList.FirstOrDefault(s => s.Id == updateId); if (targetStudent == null ) { MessageBox.Show( "未找到该ID对应的学生数据,无法修改!" , "错误提示" , MessageBoxButtons.OK, MessageBoxIcon.Error); return ; } // 4. 更新实体属性(修改数据) targetStudent.Name = txtName.Text.Trim(); targetStudent.Age = updateAge; targetStudent.ClassName = updateClassName; // 5. 重新绑定数据,刷新DataGridView展示修改结果 BindDataToDgv(_studentGlobalList); // 6. 清空输入框 ClearTextBoxes(); MessageBox.Show( "数据修改成功!" , "提示" , MessageBoxButtons.OK, MessageBoxIcon.Information); } // 可选优化:选中表格行时,自动填充到输入框(方便修改) private void dgvStudent_SelectionChanged ( object sender, EventArgs e ) { if (dgvStudent.SelectedRows.Count > 0 ) { // 获取选中行的数据(转换为Student实体,更安全) Student selectedStudent = (Student)dgvStudent.SelectedRows[ 0 ].DataBoundItem; if (selectedStudent != null ) { txtId.Text = selectedStudent.Id.ToString(); txtName.Text = selectedStudent.Name; txtAge.Text = selectedStudent.Age.ToString(); txtClassName.Text = selectedStudent.ClassName; } } }
五、删(Delete):删除数据 核心逻辑:获取 DataGridView 选中行 → 验证选中有效性 → 弹出确认对话框(防止误删) → 从全局数据源移除对应实体 → 重新绑定数据刷新表格。
实现代码
private void btnDelete_Click ( object sender, EventArgs e ) { // 1. 验证是否选中了要删除的行 if (dgvStudent.SelectedRows.Count == 0 ) { MessageBox.Show( "请先在表格中选中要删除的数据行!" , "提示" , MessageBoxButtons.OK, MessageBoxIcon.Warning); return ; } // 2. 弹出确认对话框(防止用户误操作) DialogResult result = MessageBox.Show( "确定要删除选中的这条数据吗?删除后无法恢复!" , "确认删除" , MessageBoxButtons.YesNo, MessageBoxIcon.Question); if (result != DialogResult.Yes) { return ; // 用户取消删除,直接返回 } // 3. 获取选中行对应的实体(按ID匹配,精准删除) Student selectedStudent = (Student)dgvStudent.SelectedRows[ 0 ].DataBoundItem; if (selectedStudent == null ) { MessageBox.Show( "无法获取要删除的数据,删除失败!" , "错误提示" , MessageBoxButtons.OK, MessageBoxIcon.Error); return ; } // 4. 从全局数据源中移除该实体 _studentGlobalList.RemoveAll(s => s.Id == selectedStudent.Id); // 按ID移除,确保精准删除 // 5. 重新绑定数据,刷新DataGridView(隐藏已删除数据) BindDataToDgv(_studentGlobalList); // 6. 清空输入框 ClearTextBoxes(); MessageBox.Show( "数据删除成功!" , "提示" , MessageBoxButtons.OK, MessageBoxIcon.Information); }
补充:直接单元格编辑(辅助修改方式) 除了通过「输入框 + 修改按钮」实现修改,还可以直接编辑 DataGridView 单元格内容(需设置 dgvStudent.ReadOnly = false),修改后同步到全局数据源:
// DataGridView单元格值改变事件(单元格编辑后触发) private void dgvStudent_CellValueChanged ( object sender, DataGridViewCellEventArgs e ) { // 排除表头(行索引≥0才是有效数据行) if (e.RowIndex < 0 ) return ; // 1. 获取修改后的行对应的实体 Student modifiedStudent = (Student)dgvStudent.Rows[e.RowIndex].DataBoundItem; if (modifiedStudent == null ) return ; // 2. 找到全局数据源中的对应实体,同步修改(确保全局数据一致性) Student targetStudent = _studentGlobalList.FirstOrDefault(s => s.Id == modifiedStudent.Id); if (targetStudent != null ) { targetStudent.Name = modifiedStudent.Name; targetStudent.Age = modifiedStudent.Age; targetStudent.ClassName = modifiedStudent.ClassName; } // 3. 提示修改成功(可选) MessageBox.Show( "单元格数据已同步更新!" , "提示" , MessageBoxButtons.OK, MessageBoxIcon.Information); }
六、上移下移功能 核心思路 1、先获取 DataGridView 选中行的索引(对应数据源中的元素位置)。 2、验证移动边界(上移不能超过第 0 行,下移不能超过最后一行)。 3、操作全局数据源 _studentGlobalList:通过交换列表中两个元素的位置实现移动效果。 4、重新绑定数据到 DataGridView,并保持移动后的行处于选中状态(优化用户体验)。 5、处理异常情况(未选中行、已达边界),给出友好提示。 一、完整实现代码(上移 + 下移)
1. 上移功能(Button 点击事件,命名 btnMoveUp) private void btnMoveUp_Click ( object sender, EventArgs e ) { // 1. 验证是否选中了有效行 if (dgvStudent.SelectedRows.Count == 0 ) { MessageBox.Show( "请先选中要上移的数据行!" , "提示" , MessageBoxButtons.OK, MessageBoxIcon.Warning); return ; } // 2. 获取选中行的索引(对应数据源中的位置) int selectedRowIndex = dgvStudent.SelectedRows[ 0 ].Index; // 3. 验证上移边界:不能超过第0行(已经是第一行,无法上移) if (selectedRowIndex <= 0 ) { MessageBox.Show( "当前行已是第一行,无法继续上移!" , "提示" , MessageBoxButtons.OK, MessageBoxIcon.Information); return ; } // 4. 核心:交换全局数据源中当前元素与上一个元素的位置 // 保存当前选中的实体 Student currentStudent = _studentGlobalList[selectedRowIndex]; // 交换位置(当前元素与上一行元素互换) _studentGlobalList[selectedRowIndex] = _studentGlobalList[selectedRowIndex - 1 ]; _studentGlobalList[selectedRowIndex - 1 ] = currentStudent; // 5. 重新绑定数据,刷新DataGridView BindDataToDgv(_studentGlobalList); // 6. 优化体验:选中移动后的行(上移后,选中行索引变为 selectedRowIndex - 1) dgvStudent.Rows[selectedRowIndex - 1 ].Selected = true ; MessageBox.Show( "数据行上移成功!" , "提示" , MessageBoxButtons.OK, MessageBoxIcon.Information); }
2. 下移功能(Button 点击事件,命名 btnMoveDown) private void btnMoveDown_Click ( object sender, EventArgs e ) { // 1. 验证是否选中了有效行 if (dgvStudent.SelectedRows.Count == 0 ) { MessageBox.Show( "请先选中要下移的数据行!" , "提示" , MessageBoxButtons.OK, MessageBoxIcon.Warning); return ; } // 2. 获取选中行的索引 + 数据源总长度(判断下移边界) int selectedRowIndex = dgvStudent.SelectedRows[ 0 ].Index; int dataCount = _studentGlobalList.Count; // 3. 验证下移边界:不能超过最后一行(索引 = 数据总数 - 1) if (selectedRowIndex >= dataCount - 1 ) { MessageBox.Show( "当前行已是最后一行,无法继续下移!" , "提示" , MessageBoxButtons.OK, MessageBoxIcon.Information); return ; } // 4. 核心:交换全局数据源中当前元素与下一个元素的位置 Student currentStudent = _studentGlobalList[selectedRowIndex]; // 交换位置(当前元素与下一行元素互换) _studentGlobalList[selectedRowIndex] = _studentGlobalList[selectedRowIndex + 1 ]; _studentGlobalList[selectedRowIndex + 1 ] = currentStudent; // 5. 重新绑定数据,刷新DataGridView BindDataToDgv(_studentGlobalList); // 6. 优化体验:选中移动后的行(下移后,选中行索引变为 selectedRowIndex + 1) dgvStudent.Rows[selectedRowIndex + 1 ].Selected = true ; MessageBox.Show( "数据行下移成功!" , "提示" , MessageBoxButtons.OK, MessageBoxIcon.Information); }
七、核心总结 1. CRUD 操作的核心基础是「全局数据源(_studentGlobalList)+ 数据绑定(DataSource)」,所有操作均基于全局数据源,最后通过重新绑定刷新表格。 2. 关键流程:
• 增:验证 → 添加到全局数据源 → 重新绑定; • 改:选中验证 → 匹配全局数据源实体 → 更新属性 → 重新绑定; • 删:选中验证 → 确认删除 → 移除全局数据源实体 → 重新绑定。 3. 数据一致性:所有操作必须同步全局数据源,避免表格展示与底层数据脱节。 4. 用户体验:增加输入验证、删除确认、选中行自动填充输入框等优化,减少误操作。
阅读原文:原文链接


 400 186 1886