RESTful API 设计规范
RESTful 核心概念
REST = Representational State Transfer(表现层状态转移)
- R(Representational / 表现层):资源呈现的格式,比如 JSON、XML、HTML 等,客户端和服务器用统一格式交换数据。
- S(State / 状态):核心是无状态,服务器不保存客户端的任何上下文状态,每次请求都必须自带全部信息(比如 Token、参数),请求之间完全独立。
- T(Transfer / 转移):客户端通过请求,获取、修改资源的状态。
关键提醒:RESTful API 不是协议、不是强制标准,只是一种被广泛认可的接口设计风格,它的目标是让接口更清晰、统一、易维护,减少前后端的沟通成本。
一、资源建模及 URI 设计规范
1. 确定资源(名词导向)
资源是指可以通过URI(统一资源标识符)标识的任何信息。每个资源都具有唯一的标识符,用于标识和访问该资源,并且可以以不同的格式表示,如JSON、XML 等,
- 用名词复数表示资源集合:
/users、/orders - 支持嵌套资源(层级不建议超过 3 级):
/users/123/orders - 禁止 URL 中出现动词,接口操作行为由 HTTP 请求方法决定。
- URI 结尾不加斜杠:正确
\users\123,错误 \users\123\ - 资源名称用小写名词,多词用连字符
-:正确 \user-orders,不推荐驼峰 \userOrders、下划线 \user_orders - 禁止在 URI 中出现动词(如 get、list、delete、query),操作通过 HTTP 方法表达
2. 统一响应格式
主流用 JSON(非强制,也可以用 XML/HTML),推荐全局统一返回结构:参考,具体项目决定统一即可
{
  "code": 200,
  "message": "操作成功",
  "data": {}
}
错误响应示例(统一格式)
{
  "code": 400,
  "message": "参数错误:手机号格式不正确",
  "data": null
}
分页响应示例(统一格式)
{
  "code": 200,
  "message": "操作成功",
  "data": {
    "list": [], // 分页数据列表
    "total": 100, // 总条数
    "page": 1, // 当前页码
    "size": 10 // 每页条数
  }
}
3.设计常见易错点
团队约定一致
| | | |
|---|
| /userOrders | /user-orders | |
| /user_orders | /user-orders | |
| | /users | |
| POST /queryUser | GET /users/123 | |
| GET /deleteUser/123 | DELETE /users/123 | |
| POST /updateUser | PUT /users/123 | |
| return R.ok().setMsg("参数错误") | return R.error(400,"参数错误") | |
| pageNo | | |
4. 那个是标准的RESTful API
**A. GET /getUsers**:错误,URI 里出现了动词 get,违反 “只用名词表示资源” 的原则。
**B. GET /user/list**:错误,用了单数名词 user,且包含 list,不规范。
**C. POST /users/query**:错误,查询操作应该用 GET 方法,且 URI 里出现了动词 query。
**D. GET /users/delete/123**:错误,删除操作应该用 DELETE 方法,且 URI 里出现了动词 delete。
正确写法参考:
查询所有用户:GET /users
查询单个用户:GET /users/123
创建用户:POST /users
更新用户:PUT /users/123
删除用户:DELETE /users/123
常见避坑要点
- 禁止 URI 中出现动词(如 get/list/query/delete),用 HTTP 方法表达操作。
- 禁止所有接口都用 POST。查询用 GET、删除用 DELETE,语义要对应。
- 禁止乱用状态码(比如参数错误返回 200,应该返回 400)。
- 统一响应格式,所有接口都用相同的 JSON 结构,方便前端处理。
- 版本控制用 URL 路径,避免接口升级影响老用户。
二、幂等语义
多次执行相同请求,与一次执行产生的副作用相同。
非幂等解决方案
部分业务 POST 接口无法天然保证幂等,可自定义规则处理:
- 请求头携带幂等标识:
Idempotency-Key - 服务端缓存该 Key 的处理结果,拦截重复请求,避免重复处理等问题。
POST /api/orders
Idempotency-Key: 550e8400-e29b-41d4-a716-446655440000
Content-Type: application/json

{
  "productId": 1001,
  "quantity": 2
}
三、状态码规
Http状态地址
| | | |
|---|
| | | |
| | 200 OK
201 Created
204 No Content | 200:查询 / 更新成功
201:创建成功(POST)
204:删除成功(无返回内容) |
| | 301 Moved Permanently
304 Not Modified | |
| | 400 Bad Request
401 Unauthorized
403 Forbidden
404 Not Found
429 Too Many Requests | 400:参数错误
401:未登录 / Token 无效
403:权限不足4
04:资源不存在
429:请求频繁被限流 |
| | 500 Internal Server Error
503 Service Unavailable
504 Gateway Timeout | 500:服务器内部异常
503:服务暂时不可用
504: 网关超时 |
四、版本化
- API 演进无法避免变更(字段增删、类型修改、业务逻辑调整)
| | | |
|---|
| /v1/users | | |
| Accept: version=1 | | |
| API-Version: 1 | | |
推荐用 URL 路径版本,兼容老用户:
示例
@RestController
publicclass UserController {

    // v1 版本:返回简单用户信息
    @GetMapping("/v1/users/{id}")
    public UserV1 getUserV1(@PathVariable Long id) {
        return userService.getUserV1(id);
    }

    // v2 版本:返回增强用户信息(更多字段)
    @GetMapping("/v2/users/{id}")
    public UserV2 getUserV2(@PathVariable Long id) {
        return userService.getUserV2(id);
    }
}
五、OpenAPI规范
OpenAPI简介
OpenAPI 规范(OpenAPI Specification,简称 OAS)是一种**用于描述 RESTful API 的标准化格式。2015年,Swagger 规范被捐赠给了Linux基金会下的 OpenAPI 倡议组织,并更名为 OpenAPI 规范 ,OpenAPI 规范(OAS)是一种用于描述 RESTful API 的标准格式(JSON / YAML)。
为什么需要 OpenAPI 规范
OpenAPI 能描述什么
| |
|---|
| 基本信息 | |
| 路径(端点) | |
| HTTP 方法 | |
| 参数 | |
| 请求/响应格式 | |
| 认证方式 | |
| 状态码 | |
与下文内容的关联
| |
|---|
| |
| |
| OpenAPI 3 规范在 Spring Boot 中的实现 |
| |
| 基于 Swagger 2.0 (OpenAPI 2) 规范的增强 UI |
5.1 Swagger2
Swagger2(Springfox)是一个用于生成、描述、调用和可视化 RESTful 风格 Web 服务的框架。
核心功能:
5.1.1 依赖
<!-- Swagger2 核心库 -->
<dependency>
    <groupId>io.springfox</groupId>
    <artifactId>springfox-swagger2</artifactId>
    <version>2.9.2</version>
</dependency>

<!-- Swagger2 UI 界面 -->
<dependency>
    <groupId>io.springfox</groupId>
    <artifactId>springfox-swagger-ui</artifactId>
    <version>2.9.2</version>
</dependency>
注意:Spring Boot 2.6+ 需要在配置文件中添加路径匹配策略,见下方配置。
5.1.2 配置文件
swagger:
  enabled: true                              # Swagger 开关
Spring Boot 2.6.0 开始,默认的路径匹配策略从 AntPathMatcher 变更为 PathPatternParser。
而 Swagger2 内部硬编码依赖 AntPathMatcher 进行路径解析,无法兼容新的 PathPatternParser,导致以下问题:
- 启动时报错
Failed to start bean 'documentationPluginsBootstrapper' - 访问
/swagger-ui.html 时出现 "Unable to infer base url" 弹窗
spring:
  mvc:
    pathmatch:
      matching-strategy: ant_path_matcher   # Spring Boot 2.6+ 必须配置
5.1.3 配置类
package com.xing.config;

import org.springframework.beans.factory.annotation.Value;
import org.springframework.context.annotation.Bean;
import org.springframework.context.annotation.Configuration;
import org.springframework.web.servlet.config.annotation.WebMvcConfigurer;
import springfox.documentation.builders.ApiInfoBuilder;
import springfox.documentation.builders.PathSelectors;
import springfox.documentation.builders.RequestHandlerSelectors;
import springfox.documentation.service.ApiInfo;
import springfox.documentation.spi.DocumentationType;
import springfox.documentation.spring.web.plugins.Docket;
import springfox.documentation.swagger2.annotations.EnableSwagger2;

@Configuration
@EnableSwagger2
publicclass SwaggerConfig implements WebMvcConfigurer {

    @Value("${swagger.enabled:true}")
    privateboolean swaggerEnabled;

    // Web端分组
    @Bean
    public Docket webApi() {
        returnnew Docket(DocumentationType.SWAGGER_2)
                .groupName("web端")
                .select()
                .apis(RequestHandlerSelectors.basePackage("com.xing.controller.web"))
                .paths(PathSelectors.any())
                .build();
    }

    // 移动端分组
    @Bean
    public Docket mobileApi() {
        returnnew Docket(DocumentationType.SWAGGER_2)
                .groupName("移动端")
                .select()
                .apis(RequestHandlerSelectors.basePackage("com.xing.controller.mobile"))
                .paths(PathSelectors.any())
                .build();
    }

    // 第三方Api分组
    @Bean
    public Docket thirdPartyApi() {
        returnnew Docket(DocumentationType.SWAGGER_2)
                .groupName("第三方Api")
                .select()
                .apis(RequestHandlerSelectors.basePackage("com.xing.controller.api"))
                .paths(PathSelectors.any())
                .build();
    }


    /**
     * API 基本信息
     */
    private ApiInfo apiInfo() {
        returnnew ApiInfoBuilder()
                .title("用户服务 API 文档")           // 标题
                .description("用户服务的 RESTful API 接口文档")  // 描述
                .version("v1.0.0")
                .build();
    }
}
5.1.4 注解使用
| | |
|---|
@Api | | |
@ApiOperation | | |
@ApiParam | | |
@ApiImplicitParam | 描述非对象参数(如 @RequestParam、@PathVariable) | |
@ApiImplicitParams | | |
@ApiModel | | |
@ApiModelProperty | | |
@ApiResponse | | |
@ApiIgnore | | |
5.1.5 Controller 示例
@RestController
@RequestMapping("/api/UserEntitys")
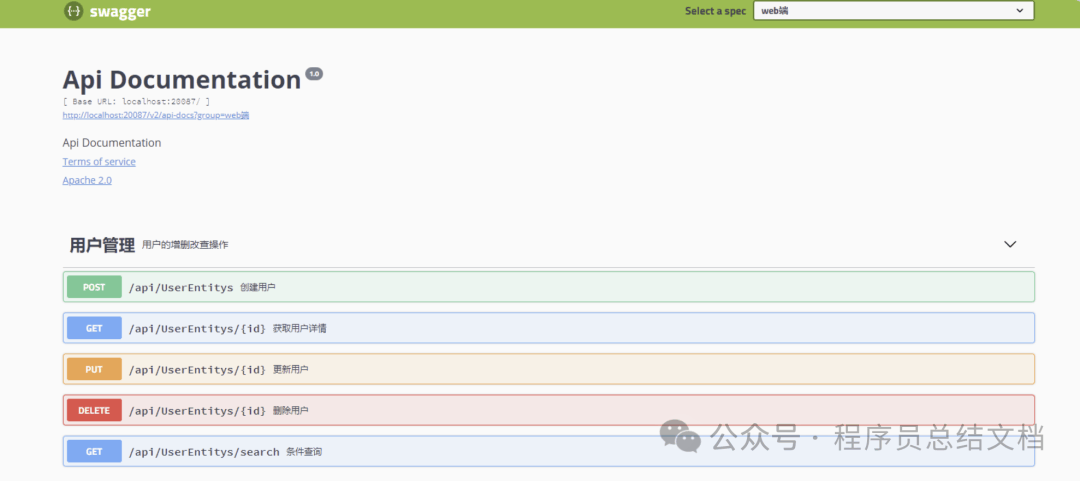
@Api(tags = "用户管理", description = "用户的增删改查操作")
publicclass UserEntityController {

    @GetMapping("/{id}")
    @ApiOperation(value = "获取用户详情", notes = "根据用户ID查询用户信息")
    @ApiImplicitParam(name = "id", value = "用户ID", required = true, dataType = "Long", paramType = "path", example = "123")
    public UserEntity getUserEntity(@PathVariable Long id) {
        returnnew UserEntity(id, "张三", "zhangsan@example.com");
    }

    @PostMapping
    @ApiOperation(value = "创建用户", notes = "新增一个用户")
    @ApiImplicitParam(name = "UserEntity", value = "用户对象", required = true, dataType = "UserEntity", paramType = "body")
    public UserEntity createUserEntity(@RequestBody UserEntity UserEntity) {
        return UserEntity;
    }

    @PutMapping("/{id}")
    @ApiOperation(value = "更新用户", notes = "全量更新用户信息")
    public UserEntity updateUserEntity(@PathVariable Long id, @RequestBody UserEntity UserEntity) {
        UserEntity.setId(id);
        return UserEntity;
    }

    @DeleteMapping("/{id}")
    @ApiOperation(value = "删除用户", notes = "根据用户ID删除用户")
    @ApiParam(name = "id", value = "用户ID", required = true, example = "123")
    public String deleteUserEntity(@PathVariable Long id) {
        return"删除成功";
    }

    @GetMapping("/search")
    @ApiOperation(value = "条件查询", notes = "根据用户名模糊查询")
    @ApiImplicitParams({
            @ApiImplicitParam(name = "name", value = "用户名", paramType = "query", dataType = "String"),
            @ApiImplicitParam(name = "page", value = "页码", paramType = "query", dataType = "Integer", example = "1"),
            @ApiImplicitParam(name = "size", value = "每页条数", paramType = "query", dataType = "Integer", example = "10")
    })
    public String searchUserEntitys(@RequestParam(required = false) String name,
                              @RequestParam(defaultValue = "1") Integer page,
                              @RequestParam(defaultValue = "10") Integer size) {
        return"查询结果";
    }

    @ApiIgnore// 此接口不显示在文档中
    @GetMapping("/internal")
    public String internalApi() {
        return"内部接口";
    }
}
5.1.6 实体类示例
@Data
@NoArgsConstructor
@AllArgsConstructor
@ApiModel(description = "用户实体")
publicclass UserEntity {

    @ApiModelProperty(value = "用户ID", example = "1001", required = true)
    private Long id;

    @ApiModelProperty(value = "用户名", example = "张三", required = true, position = 1)
    private String name;

    @ApiModelProperty(value = "邮箱", example = "zhangsan@example.com", required = true, position = 2)
    private String email;

    @ApiModelProperty(value = "年龄", example = "25", position = 3)
    private Integer age;

    @ApiModelProperty(value = "手机号", example = "13800138000", position = 4)
    private String phone;

    @ApiModelProperty(value = "创建时间", hidden = true)  // hidden = true 在文档中隐藏
    private String createdAt;

    public UserEntity(Long id, String name, String mail) {
        this.id = id;
        this.name = name;
        this.email = mail;
    }
}
5.1.7 访问地址
Swagger UI 界面 http://ip:port/项目路径/swagger-ui.htm
5.1.8 添加账号密码访问
集成 Spring Security
1. 添加依赖
<dependency>
    <groupId>org.springframework.boot</groupId>
    <artifactId>spring-boot-starter-security</artifactId>
</dependency>
2. 配置 Spring Security
package com.example.config;

import org.springframework.context.annotation.Configuration;
import org.springframework.security.config.annotation.authentication.builders.AuthenticationManagerBuilder;
import org.springframework.security.config.annotation.web.builders.HttpSecurity;
import org.springframework.security.config.annotation.web.configuration.EnableWebSecurity;
import org.springframework.security.config.annotation.web.configuration.WebSecurityConfigurerAdapter;
import org.springframework.security.crypto.password.NoOpPasswordEncoder;

@Configuration
@EnableWebSecurity
publicclass SecurityConfig extends WebSecurityConfigurerAdapter {

    @Override
    protected void configure(HttpSecurity http) throws Exception {
        http.csrf().disable()
            .authorizeRequests()
                .antMatchers("/swagger-ui.html", "/v2/api-docs", "/swagger-resources/**", "/webjars/**")
                .authenticated()
                .anyRequest().permitAll()
                .and()
            .httpBasic();
    }

    @Override
    protected void configure(AuthenticationManagerBuilder auth) throws Exception {
        auth.inMemoryAuthentication()
            .passwordEncoder(NoOpPasswordEncoder.getInstance())
            .withUser("admin")
            .password("123456")
            .roles("USER");
    }
}
3. 访问地址(不变)
Swagger UI 界面 http://ip:port/项目路径/swagger-ui.htm
4.对比
5.2 Swagger3
Swagger2已经停止维护了,取而代之的是 swagger3,
5.2.1 依赖
   <dependency>
       <groupId>org.springdoc</groupId>
       <artifactId>springdoc-openapi-ui</artifactId>
       <version>1.5.10</version>
   </dependency>
5.2.2 添加配置类
。进行SpringDoc的配置,使用OpenAPI来配置基础的文档信息,通过GroupedOpenApi配置分组的API文档,SpringDoc支持直接使用接口路径进行配置
@Configuration
publicclass Swagger3Configuration {

    @Bean
    public OpenAPI customOpenAPI() {
        returnnew OpenAPI().info(new Info()
                .title("代码平台 API")
                .description("SpringDoc API 演示")
                .version("v1.0.0")
        );
    }

    @Bean
    public GroupedOpenApi adminApi() {
        return GroupedOpenApi.builder()
                .group("普通接口文档")
                .pathsToMatch("/web/**")
                .build();
    }

    @Bean
    public GroupedOpenApi homeApi() {
        return GroupedOpenApi.builder()
                .group("首页相关接口")
                .pathsToMatch("/test/**")
                .build();
    }

    //或者注入配置类,在yml配置后,这里直接使用
    @Bean
    public GroupedOpenApi publicApi(SwaggerProperties swaggerProperties) {
        return GroupedOpenApi.builder()
                .group("第三方接口")
                .pathsToMatch("/external/**")
             //           .packagesToScan(swaggerProperties.getBasePackage()+".external")  并且的关系
                .build();
    }
}
5.2.3 可选的配置文件
springdoc:
  swagger-ui:
    # 修改Swagger UI路径
    path:/swagger-ui.html
    # 开启Swagger UI界面
    enabled:true
api-docs:
    # 修改api-docs路径
    path:/v3/api-docs
    # 开启api-docs
    enabled:true
5.2.4 注解使用
| | |
|---|
| @Tag(name = "接口类描述") | |
| @Operation(summary = "接口方法描述") | Controller 方法上 |
| @Parameters | |
| @Parameter(description = "参数描述") | @Parameters |
| @Parameter(description = "参数描述") | |
| @Parameter(hidden = true) 或 @Operation(hidden = true) 或 @Hidden | |
| @Schema | |
| @Schema | |
5.2.5 Controller示例
@RestController
@RequestMapping("/web/UserEntitys")
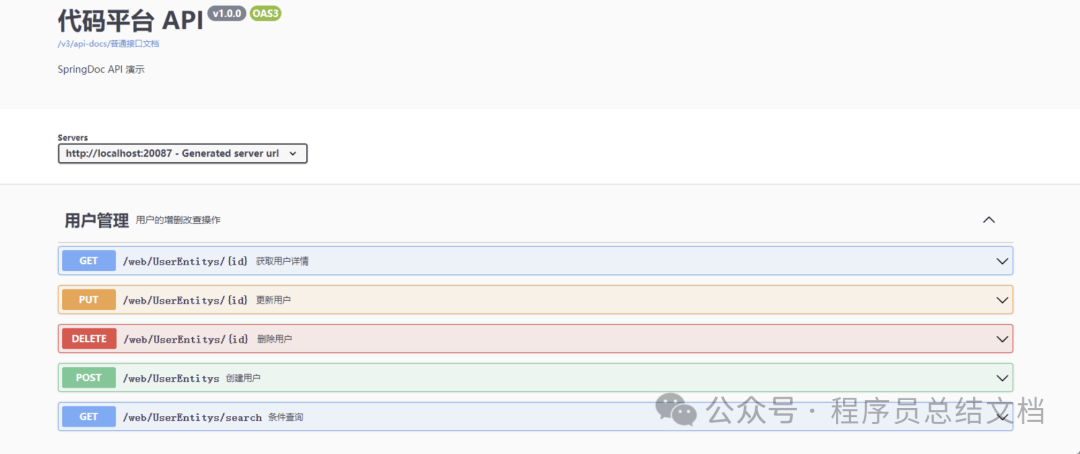
@Tag(name = "用户管理", description = "用户的增删改查操作")
publicclass UserEntityController {

    @GetMapping("/{id}")
    @Operation(summary = "获取用户详情", description = "根据用户ID查询用户信息")
    @Parameter(name = "id", description = "用户ID", required = true, example = "123")
    public UserEntity getUserEntity(@PathVariable Long id) {
        returnnew UserEntity(id, "张三", "zhangsan@example.com");
    }

    @PostMapping
    @Operation(summary = "创建用户", description = "新增一个用户")
    @Parameter(name = "UserEntity", description = "用户对象", required = true)
    public UserEntity createUserEntity(@RequestBody UserEntity UserEntity) {
        return UserEntity;
    }

    @PutMapping("/{id}")
    @Operation(summary = "更新用户", description = "全量更新用户信息")
    public UserEntity updateUserEntity(@PathVariable Long id, @RequestBody UserEntity UserEntity) {
        UserEntity.setId(id);
        return UserEntity;
    }

    @DeleteMapping("/{id}")
    @Operation(summary = "删除用户", description = "根据用户ID删除用户")
    @Parameter(name = "id", description = "用户ID", required = true, example = "123")
    public String deleteUserEntity(@PathVariable Long id) {
        return"删除成功";
    }

    @GetMapping("/search")
    @Operation(summary = "条件查询", description = "根据用户名模糊查询")
    @Parameters({
            @Parameter(name = "name", description = "用户名"),
            @Parameter(name = "page", description = "页码", example = "1"),
            @Parameter(name = "size", description = "每页条数", example = "10")
    })
    public String searchUserEntitys(@RequestParam(required = false) String name,
                                    @RequestParam(defaultValue = "1") Integer page,
                                    @RequestParam(defaultValue = "10") Integer size) {
        return"查询结果";
    }

    @Hidden// 此接口不显示在文档中
    @GetMapping("/internal")
    public String internalApi() {
        return"内部接口";
    }
}
5.2.6 实体类示例
@Data
@NoArgsConstructor
@AllArgsConstructor
@Schema(description = "用户实体")
publicclass UserEntity {

    @Schema(description = "用户ID", example = "1001", required = true)
    private Long id;

    @Schema(description = "用户名", example = "张三", required = true)
    private String name;

    @Schema(description = "邮箱", example = "zhangsan@example.com", required = true)
    private String email;

    @Schema(description = "年龄", example = "25")
    private Integer age;

    @Schema(description = "手机号", example = "13800138000")
    private String phone;

    @Schema(description = "创建时间", hidden = true)  // hidden = true 在文档中隐藏
    private String createdAt;

    public UserEntity(Long id, String name, String mail) {
        this.id = id;
        this.name = name;
        this.email = mail;
    }
}
5.2.7 访问地址
Swagger UI 界面 http://ip:port/项目路径/swagger-ui.htm
5.3 Knife4j 2.x(基于 Swagger2)
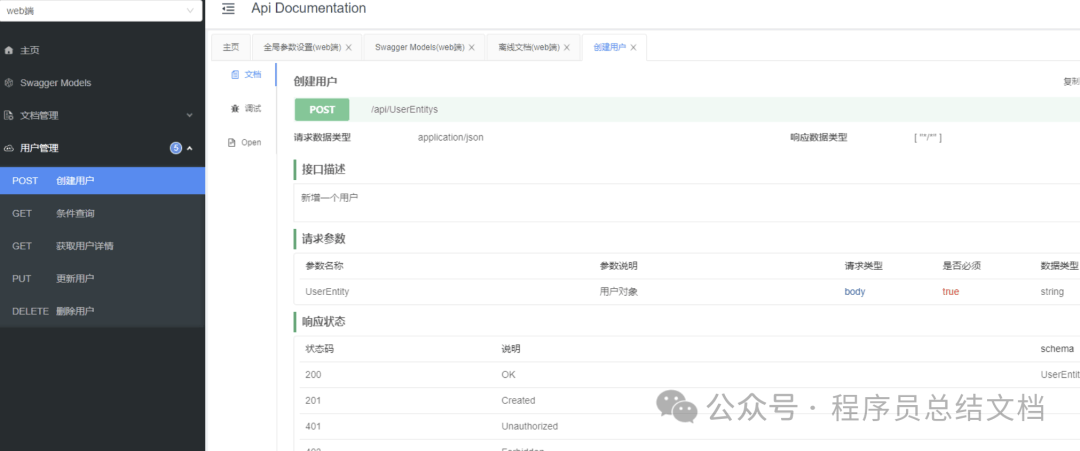
Knife4j 2.x 版本基于 Swagger2(OpenAPI v2) 规范,
Knife4j 是 Swagger/OpenAPI 的增强 UI 工具,提供更美观的界面和更丰富的功能。
Knife4j版本2.x与 Swagger2 完全相同(@Api、@ApiOperation、@ApiModel 等),无需修改业务代码。
需要变化的如下:
5.3.1 依赖
<!-- 移除原生 Swagger2 依赖,添加 Knife4j -->
        <dependency>
            <groupId>com.github.xiaoymin</groupId>
            <artifactId>knife4j-spring-boot-starter</artifactId>
            <version>3.0.2</version>
        </dependency>
5.3.2 注解
@EnableKnife4j不是必须的,用于开启 Knife4j 的增强功能**,不影响基础文档的访问,但建议加上确保完整体验**
5.3.3 访问地址
http://ip:port/项目路径/doc.html
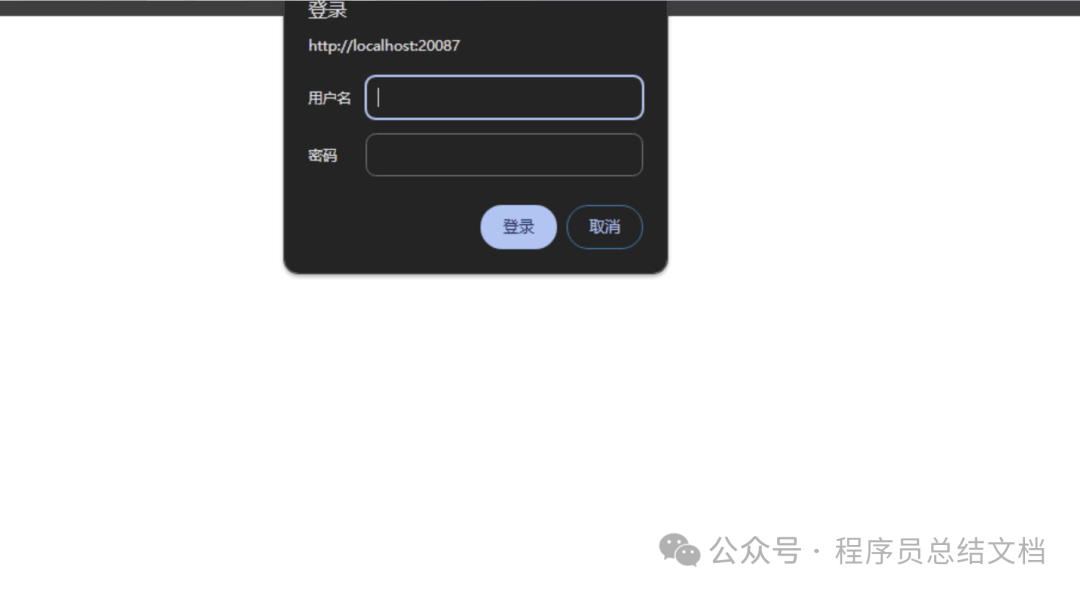
5.3.4 添加账号密码访问
修改配置类即可
# Knife4j 配置
knife4j:
enable:true                    # 开启 Knife4j 增强功能
production:false               # 生产环境设为 true 可屏蔽文档
basic:
    enable:true
    username:admin
    password:123456
5.4 Knife4j 3.x(基于 Swagger3)
Knife4j 3.x 版本基于 Swagger3(OpenAPI v3) 规范
5.4.1 依赖(3选1)
<dependency>
    <groupId>com.github.xiaoymin</groupId>
    <artifactId>knife4j-spring-boot-starter</artifactId>
    <version>3.0.2</version>
</dependency>
<dependency>
    <groupId>com.github.xiaoymin</groupId>
    <artifactId>knife4j-openapi3-spring-boot-starter</artifactId>
    <version>4.3.0</version>
</dependency>
<dependency>
    <groupId>com.github.xiaoymin</groupId>
    <artifactId>knife4j-openapi3-jakarta-spring-boot-starter</artifactId>
    <version>4.5.0</version>
</dependency>
区别
| | | | | |
|---|
knife4j-spring-boot-starter | | @Api | | | /doc.html |
knife4j-openapi3-spring-boot-starter | | @Tag | | | /doc.html |
knife4j-openapi3-jakarta-spring-boot-starter | | @Tag | | | /doc.html |
注意 :OpenAPI 3 无需 @EnableSwagger2 或 @EnableKnife4j 注解,引入依赖后自动生效。
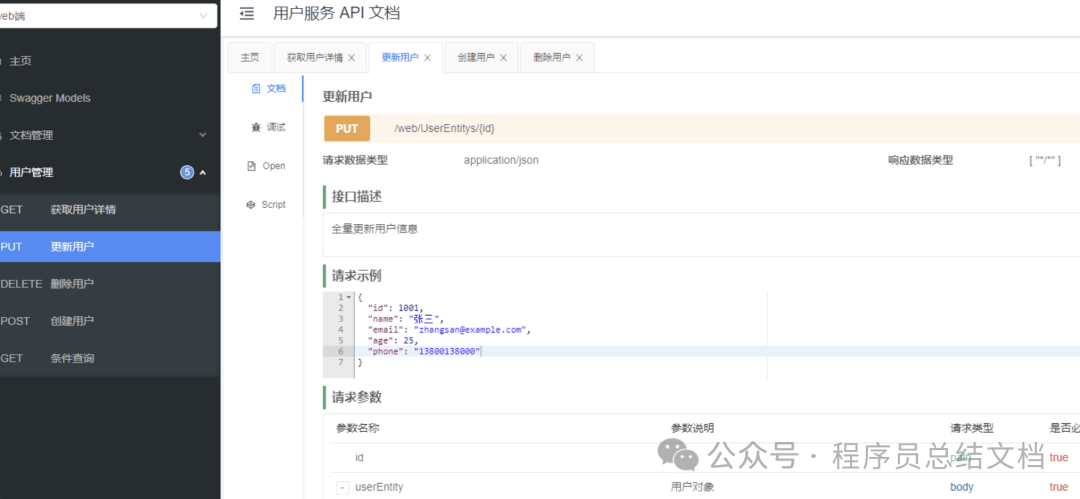
5.4.2 访问地址
http://ip:port/项目路径/doc.html
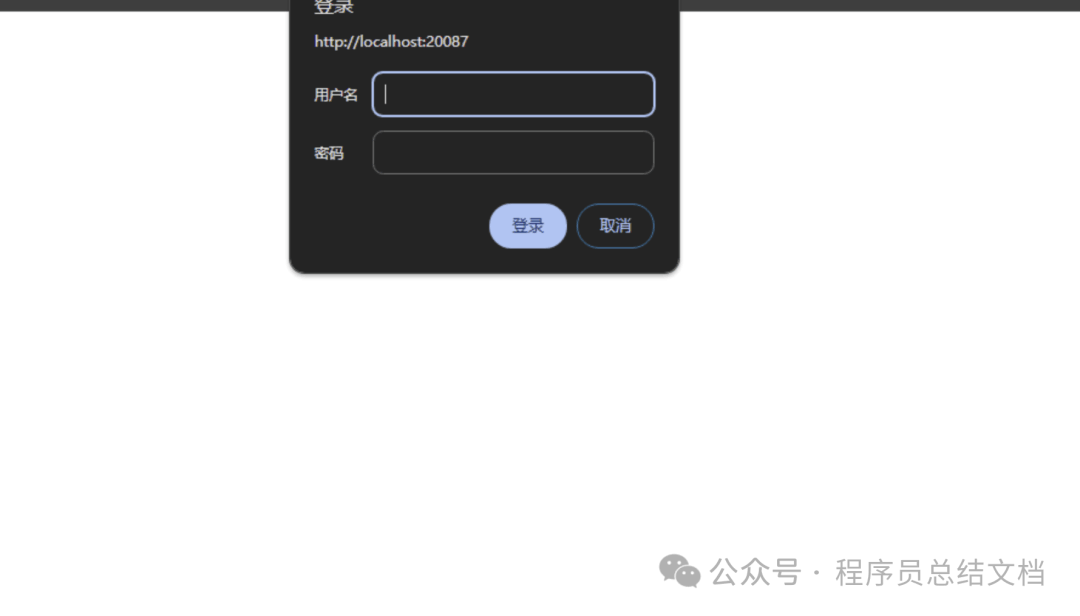
5.4.3 添加账号密码访问
修改配置类即可
# Knife4j 配置
knife4j:
enable:true                    # 开启 Knife4j 增强功能
production:false               # 生产环境设为 true 可屏蔽文档
basic:
    enable:true
    username:admin
    password:123456
5.5 常见问题
5.5.1 Spring Boot 2.6+ 访问 /swagger-ui.html 报错?
在配置文件中添加路径匹配策略
spring:
  mvc:
    pathmatch:
      matching-strategy: ant_path_matcher
5.5.2 生产环境如何关闭 Swagger?
配置文件中关闭
swagger:
  enabled: false
使用 @Profile 注解
@Configuration
@EnableSwagger2
@Profile({"dev", "test"})   // 仅开发/测试环境生效
public class SwaggerConfig {
    // ...
}
六、总结
RESTful 是风格,而不是一种约束规则或枷锁。API 设计的最终目标是:让团队高效协作、系统稳定可维护。






 400 186 1886


